Showing posts with label Gifting. Show all posts

Wednesday, December 7, 2011

More Gifting

I didn't realize that it had been so long since the last post. Three weeks! I'm still not in a routine. It's almost like I still think I'm on vacation, even though I haven't worked for nearly 2 months. I think that I had worked so hard for so long that it's making me want to make up for all of that now. Hah! I have been very busy, though. I'm still in serious Christmas crafting mode. I'm nearly done with my first major gift basket. It is INCREDIBLE. Not to toot my own horn or anything, but seriously. It is incredible. I made monogrammed coasters (with my amazing Silhouette SD), a coffee mug with a coordinating monogram with 2 bags of homemade hot chocolate on a stick, homemade microwave popcorn, peppermint bark, homemade playdough for the kiddo, a Santa key, homemade brown sugar scrub for the momma, and a homemade caramel sauce. Did you catch a theme? Yes, everything is homemade.

I made a cute little custom clipboard for my 5-year old niece. She's very in to school, and loves practicing her letters and numbers. I thought it would be a lot of fun to give her a personalized clipboard with a pencil attached so she can carry it around the house to have something to bear down on while she practices.

I took a really pretty piece of scrapbook paper, and measured it against the clipboard. I marked the corners with a pencil, and just made simple cuts with a craft knife. 


I used some spray adhesive and matched up all of the edges. Unfortunately I am not good  suck at cutting around the actual "clip" part of a clipboard. I've tried it before and it was a total failure. I'm playing it safe here by leaving the top part uncovered.


After that, I found some coordinating paper to trim the edge. I measured the edge and corner on the right side, then cut around the cute little flowers. Once again using the spray adhesive, I attached the border to the side.


After that, I found some polka-dot stickers to spell out her name so I could personalize it for her.


What I ended up doing with the top was wrapping some brown grosgrain ribbon around the top and tying a pencil to it with some jute. I'll add a picture soon of the finished product. So cute!

Next on my list of to-do's: more coasters, more personalized coffee mugs, felt finger puppets, homemade dog treats, and snow globes.

So much to do!! I'll finish up now so that I can get my rest! I have a very busy next two days ahead of me.

Thursday, November 17, 2011

More Christmas Gifting

So, tonight I decided that I would try some homemade playdough. I figured that I would probably end up making a couple of batches with a couple of different recipes before I decided which one was easiest/I liked best. I was completely wrong. The very first one that I came to, which can be found here, worked perfectly well. There are several recipes on this website, but I went with my gut and used the first one. I, luckily, had already been planning on making some playdough, so I went to the Dollar Tree yesterday and picked up some amazing containers.


It's funny how perfect they are... I made 7 complete batches of playdough today, using that very recipe that I linked, AND each batch fits into exactly 6 of these containers. It's almost like they were meant for each other. Hah! I ended up going back to the Dollar Tree this evening for 4 more packages, a total of 6, and now I have some left over... but I'm super- happy about this because I know I'll find another amazing use for them. I'll tell you later what I'm even happier about.


Here are the ingredients... one cup of flour, 1/2 cup of  salt, 1 Tbsp of cream of tartar, 1 Tbsp of oil (the recipe calls for vegetable oil, but I used canola oil), and food coloring.


First, add the salt in a small or medium saucepan:


Then the flour:  


Of course, if you're feeling crazy you could probably do the flour first, and the salt second. But only if you're feeling crazy.

 Add the cream of tartar:


The oil:


Finally the water. We didn't take a picture of the water. I'm going to assume that we all have a good mental image of water in a measuring cup and proceed to the food coloring.


I actually added a few more drops of blue after I stirred this up a bit, and the end result was very nice.


I made sure that all of my ingredients were mixed very well before turning on the heat. This gave me an opportunity to work through all of the flour clumps that had formed before the mixture started to morph into a solid.  You want to make sure that you use either the low or medium heat setting on your burner, and definitely no higher. Keep stirring from start to finish, otherwise you may have a lot of trouble keeping things consistent... I noticed that at one point when I turned my back to put some wax paper down on the counter (so that I could leave the playdough to cool when it was done), which took all of 30 seconds, my playdough started to form massive clumps around the inside edges of my saucepan, while the center was still very much a liquid. It took a lot of hard stirring and manipulating to come back from that. I'd say it took a good 3 or 4 solid minutes of stirring with each batch to get to the perfect consistency. You'll know when you reach that point, for sure. It's really, really easy to stir for more than half of the time you're standing there, then suddenly it begins to require a bit of elbow grease... this is a good sign. You know you're almost finished at this point.

Your pot will probably look like this:


 As soon as mine was ready to come off the stove, I spooned the mixture out onto a sheet of wax paper to let it cool out before kneading and dividing into those precious little containers.  


Pretty soon I had a massive wall of playdough. I made one without any food coloring for two reasons. The first was because M has been talking nonstop about making a playdough pizza, and I definitely had to provide her with a suitable crust. What I didn't know then was that she considers PINK to be the most suitable crust color. Hmph. My other reason was so that I could have enough playdough to fill my playdough canisters.


You see that sock monkey thing in the background? That's my playdough canister. Otherwise knows as a PRINGLES CAN!!! And that is what I am SO happy about. My husband sometimes thinks it's odd when I ask him to save random things... like a Pringles can, empty oat canisters, or emptied salsa jars. When he came home from work last night, and I was able to show off my upcycling genius, it all started to make a little bit of sense to him. We have a dear friend who has a "thing" for sock monkeys, so we had picked up some sock monkey ribbon and sock monkey scrapbook paper a few weeks ago. I wasn't sure at all at the time what we would do with them... but then, last night, everything fell together when I realized that scrapbook paper would perfectly cover the Pringles can, making the most awesome playdough container ever.


I realize the image isn't that great, but I was having some major issues with the flash in the kitchen. Believe me, in person, it's ridiculously cute. I'm excited to finish all of them. I take that back, I won't lie. I'm excited to eat more Pringles.

Saturday, November 12, 2011

I Found It!

I knew I would find the card-reader. A week or so ago, I found this excellent little single-drawer filing thingie (I'm clearly not sure what's it's really called), and I corralled all of our random USB cords and other like items into it very neatly and organized-like. That was the first place that I looked last night, however I did not think to look in the very back of it under the stuff that we don't use but once in a super-blue moon. Upon further investigation tonight, that is exactly where I found it. Seriously. Husbands.

Either way, it has been found and now I can post some pictures. I finished the jars last night, but only half-decorated them. I did a lot more work on them tonight, but they're still not finished. I still need to print out the directions and finish putting the ribbon on them. I'm really happy with how they're turning out so far. 

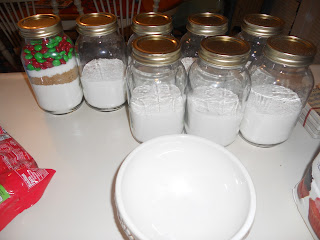
This is how my counter top looked in the pre-production phase.


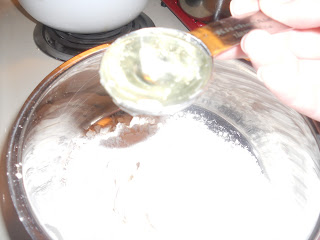
This is step one. The mixing of the flour. Very exciting, I know.


A very excited M. She thought that I was actually making the cookies. She was not so excited after finding out that wasn't necessarily the case.


This is part of the layering process. I have my flour mixture in, and the brown sugar layer going down on top here.


Another layer of just regular granulated sugar.


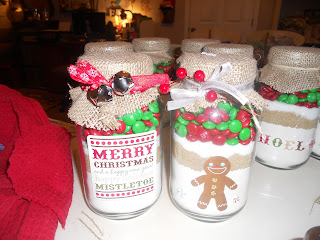
Finish off with M&M's, and it's all set! Very cute.


I realized after making the first one that it would be so much easier to just do one step at a time for all jars, rather than making one jar at a time. Things that are common sense to most people aren't necessarily common sense to me. I like to do things the hard way!


I finished off the jars with some adorable cardstock stickers made by Echo Park Paper, and I think they look AMAZING.


Mid-production. (Seriously, it's a wonder that I got anything done with all of these pictures I kept taking.)


I decided to make some cinnamon sugar shakers while I was at it! I bought two 2-packs of these little shakers at Wal-mart for $0.67.


I happened to have some of this material laying around, so I cut out some circles and wrangled them on with rubber-bands.


I love them.

I think that the thing I love most about them is the fact that I'm done with a major part of my Christmas gifting, and it's not even Thanksgiving yet. I win.

Friday, November 11, 2011

Major Production

Seriously? My card-reader has disappeared. ARG! I've been making Christmas presents for the better part of the evening, and even photo-documented a lot of my progress, yet I can't show a darn bit of proof. I'm hoping that I'll find it by the time I'm done with this entry... since of course it will take me two hours to complete... dealing with a pre-schooler and a puppy and all...

This year, since I am not working, I am taking major advantage of the time allowance to prepare for Christmas and also keeping things frugal since we're down a salary. As vain as this may sound, I used to love spending big bucks on Christmas gifts. It's not that I would just throw money around, because even though we lived fairly comfortably I've always been slightly, um, "tight" with money. However I always thought it was awesome to buy things for all of our friends and family members. I have a completely different perspective on things now. Isn't it SO much better to receive a gift that has been handmade with love?

I remember getting the warm-and-fuzzies one year when my husband's aunt gave us this cute little cookie-in-a-jar thingie, just thinking about how sweet that was to do something so personalized. Until I saw the label on it proving the item to have been store-bought. But that one moment... it really made me think that I want to do that. SO, this year that is exactly what I'm doing. I found this excellent recipe over at this site and I'm super excited about it. M and I went to Aldi earlier to get some groceries, and while we were there we picked everything up that we needed. I'm not very good at gauging measurements and yields sometimes (really great quality in a former restaurant manager, eh?) so we did make a return-visit to the grocery to get some more M&M's and brown sugar. The mason jars I had already purchased from Wal-mart a few weeks ago, and I've been hoarding scrapbooking supplies, so later I'll be decorating all of the cute little cookie jars.

I have this huge master plan, and I'm hoping that it's not too ambitious but I'm really wanting to do gift baskets for all of our family members, and families that we're close to.  I have an "A" gift basket (for people very close to us) and a "B" gift basket (for acquaintances who are very deserving of a gift), and to make things even more complicated I have mini-baskets planned out for all of the young children that we know. Nieces, nephews, friends' kiddos, M's friends... I'm going to craft some Santa keys and make a snowman-building kit. My husband thinks I've lost my mind, but I think it's just a poor combination of being slightly obsessive compulsive (I sometimes refer to it as being VERY organized) and years of having all of this pent-up craftiness that I've had no time to do anything about. I won't even talk to you about my idea notebook(s).

I'm currently roaring like a dinosaur at M, at her request, because she has "haycups" (hiccups) and I need to scare them out of her. Yes, this is my new life, and I love it.

Well, still no card-reader but I'm sure that I will find it tomorrow. And then, I will post pictures. As for now, it's time to put my little goose to bed.